
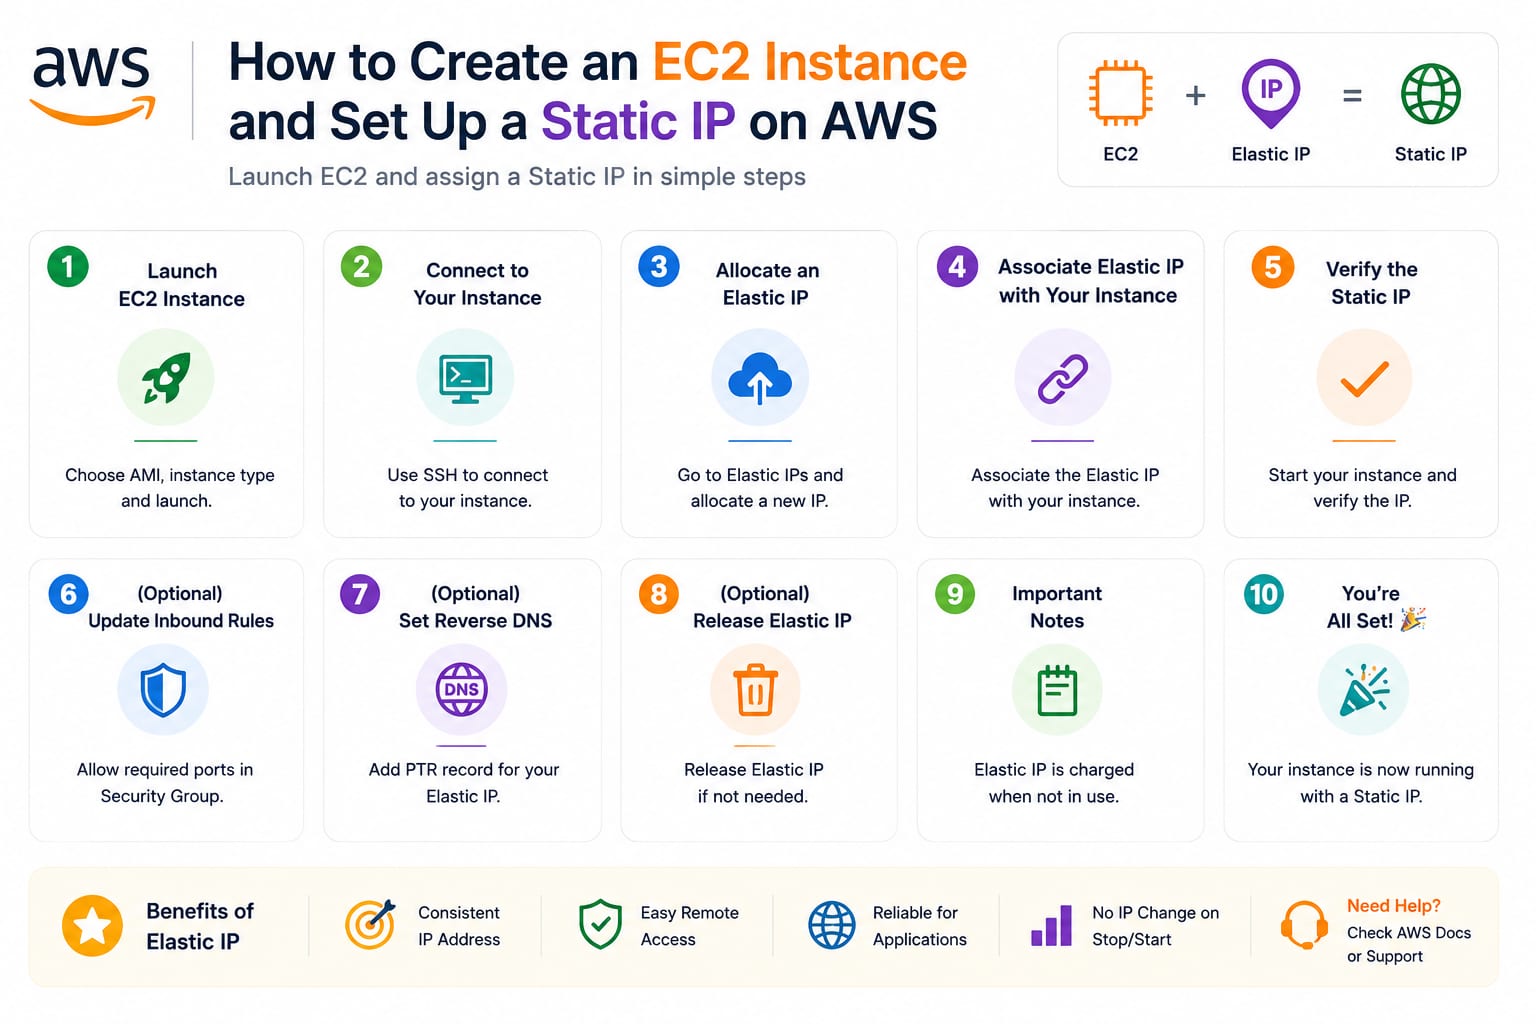
How to Create an EC2 Instance and Set Up a Static IP on AWS
Every deployment guide assumes you already have a running server with a fixed IP address. This is the guide before that guide — launching an EC2 instance from scratch, locking down access properly, and attaching an Elastic IP so your server's address never changes, even after a reboot.
Table of Contents
- What EC2 and Elastic IP Actually Are
- Prerequisites
- Step 1: Launch an EC2 Instance
- Step 2: Configure the Security Group
- Step 3: Download the Key Pair and Connect via SSH
- Step 4: Allocate an Elastic IP
- Step 5: Associate the Elastic IP with Your Instance
- Step 6: Point a Domain at Your Elastic IP
- Step 7: Basic Server Hardening
- Doing All of This via AWS CLI
- Common Mistakes and Costs to Watch
- FAQ
- Wrapping Up
1. What EC2 and Elastic IP Actually Are
EC2 (Elastic Compute Cloud) is AWS's virtual server product — you rent a slice of compute (CPU, RAM, storage) and get root access to a Linux or Windows machine.
Elastic IP is a static, public IPv4 address you own within your AWS account. By default, an EC2 instance gets a public IP that changes every time you stop and start it. An Elastic IP solves that — you allocate one address, associate it with your instance, and it stays the same no matter how many times the instance restarts. This matters the moment you point a domain's DNS record at your server, or hardcode an IP anywhere in a config.
2. Prerequisites
- An AWS account with billing set up
- Basic comfort with a terminal (any OS — Terminal on Mac/Linux, PowerShell or WSL on Windows)
- An SSH client (built into Mac/Linux terminals; use PuTTY or WSL on Windows)
3. Step 1: Launch an EC2 Instance
- Log into the AWS Management Console and search for EC2 in the top search bar.
- Click Launch Instance.
- Name your instance — something identifiable like
myapp-production. - Choose an AMI (Amazon Machine Image) — for most Laravel/PHP or Node apps, Ubuntu Server 24.04 LTS is a solid, well-documented default.
- Choose an instance type —
t3.microort3.smallis enough for a small production app or staging environment; scale up later without recreating the instance.
- Create a new key pair:Click Create new key pair
- Name it (e.g.
myapp-key) - Key type: RSA, format: .pem (for Mac/Linux/WSL) or .ppk (for PuTTY on Windows)
- Download it immediately — AWS only lets you download it once, and you cannot recover it later if lost
- Network settings — leave the default VPC unless you have a specific networking requirement; we'll configure the security group in the next step.
- Configure storage — 20–30 GB gp3 is a reasonable starting point for most small-to-medium apps.
- Click Launch Instance.
Within a minute or two, your instance status will show as Running.
4. Step 2: Configure the Security Group
A security group is your instance's firewall — it controls what traffic can reach it. Do this properly; it's the single most common source of "why can't I connect" and "why did my server get compromised" problems.
Go to your instance's Security tab, click into the attached security group, and edit Inbound rules:
TypePortSourcePurposeSSH22Your IP only (My IP)Admin access — never leave this open to 0.0.0.0/0HTTP80Anywhere (0.0.0.0/0)Public web trafficHTTPS443Anywhere (0.0.0.0/0)Public web traffic (TLS)
The SSH rule is the one people get wrong. Setting the source to "Anywhere" means anyone on the internet can attempt to brute-force your server's SSH login. Always scope it to My IP, and update it if your home/office IP changes. If your team connects from multiple locations, use a bastion host or a VPN instead of opening SSH to the world.
5. Step 3: Download the Key Pair and Connect via SSH
On Mac/Linux/WSL, lock down the key file's permissions first — SSH refuses to use a key that's readable by other users:
bash
chmod 400 myapp-key.pem
Connect to your instance using its public IPv4 address (visible on the instance's detail page):
bash
ssh -i myapp-key.pem ubuntu@<your-instance-public-ip>
The default username depends on the AMI: ubuntu for Ubuntu images, ec2-user for Amazon Linux.
If the connection hangs instead of failing immediately, it's almost always the security group blocking port 22 from your current IP — recheck the inbound rule before troubleshooting anything else.
6. Step 4: Allocate an Elastic IP
- In the EC2 console, go to Network & Security → Elastic IPs in the left sidebar.
- Click Allocate Elastic IP address.
- Leave the default settings (Amazon's pool of IPv4 addresses) and click Allocate.
You now own a static public IP — but it isn't attached to anything yet, which matters for the next step and for cost (see the pitfalls section below).
7. Step 5: Associate the Elastic IP with Your Instance
- Select the newly allocated Elastic IP from the list.
- Click Actions → Associate Elastic IP address.
- Choose Resource type: Instance, then select your instance from the dropdown.
- Click Associate.
Your instance's public IP is now this Elastic IP permanently. Stop and start the instance as many times as you want — the address won't change. (Note: terminating the instance still releases the association, so this survives restarts, not deletion.)
Reconnect using the new address to confirm it works:
bash
ssh -i myapp-key.pem ubuntu@<your-elastic-ip>
8. Step 6: Point a Domain at Your Elastic IP
If you're pointing a real domain at this server, go to your DNS provider (Route 53, Cloudflare, GoDaddy, etc.) and add:
Type: A
Name: @ (or subdomain, e.g. api)
Value: <your-elastic-ip>
TTL: 300 (5 minutes, so changes propagate fast if you need to move servers later)
DNS propagation typically takes a few minutes to a few hours depending on your provider and existing TTL values.
9. Step 7: Basic Server Hardening
Before anything goes near production, spend ten minutes on the basics:
bash
# Update everything first
sudo apt update && sudo apt upgrade -y

# Enable the firewall (UFW) and only allow what you actually need
sudo ufw allow OpenSSH
sudo ufw allow 'Nginx Full'
sudo ufw enable

# Disable password-based SSH login — key-only access
sudo nano /etc/ssh/sshd_config
# Set: PasswordAuthentication no
sudo systemctl restart sshd

# Set up automatic security updates
sudo apt install unattended-upgrades -y
sudo dpkg-reconfigure --priority=low unattended-upgrades
10. Doing All of This via AWS CLI
If you'd rather script the whole setup (useful for reproducible environments or Infrastructure-as-Code pipelines):
bash
# Launch an instance
aws ec2 run-instances \
  --image-id ami-0abcdef1234567890 \
  --instance-type t3.micro \
  --key-name myapp-key \
  --security-group-ids sg-0123456789abcdef0 \
  --subnet-id subnet-0123456789abcdef0 \
  --tag-specifications 'ResourceType=instance,Tags=[{Key=Name,Value=myapp-production}]'

# Allocate an Elastic IP
aws ec2 allocate-address --domain vpc

# Associate it with your instance
aws ec2 associate-address \
  --instance-id i-0123456789abcdef0 \
  --allocation-id eipalloc-0123456789abcdef0
Swap in your actual AMI ID, security group ID, and subnet ID — these are account and region-specific, visible in the console or via aws ec2 describe-images / describe-security-groups.
11. Common Mistakes and Costs to Watch
- Leaving SSH open to
0.0.0.0/0— the single most common way small servers get compromised - Losing the
.pemfile — there's no recovery; you'd need to detach the volume, attach it to another instance, and manually add a new key - An unassociated Elastic IP — AWS charges for Elastic IPs that are allocated but not attached to a running instance, specifically to discourage hoarding addresses. Release ones you're not using.
- Forgetting to update the security group's "My IP" rule — if your home IP changes (common with most ISPs), you'll suddenly get connection timeouts and might assume the server is down
- Skipping the firewall entirely — a security group is not a substitute for UFW/iptables on the instance itself; use both
12. FAQ
Does the Elastic IP cost extra once it's attached? No — an Elastic IP associated with a running instance is free. Charges only apply when it's allocated but unattached, or attached to a stopped instance.
Can I move the Elastic IP to a different instance later? Yes — disassociate it from the current instance and associate it with the new one. This is exactly how you'd do a zero-downtime server migration: bring up the new instance, test it, then swap the IP over.
What if I need more than one static IP? Each AWS account gets a default quota of 5 Elastic IPs per region (increasable via a support request), which is more than enough for most small-to-medium setups.
13. Wrapping Up
This is the unglamorous groundwork that every deployment pipeline assumes already exists. Get the security group and Elastic IP right once, and everything downstream — SSH-based deploys, domain setup, SSL certificates — becomes straightforward instead of a source of mystery connection failures.
Setting this up alongside a CI/CD pipeline? This pairs directly with the GitHub Actions auto-deploy setup — once you've got a fixed IP and a locked-down security group here, that pipeline can target this instance reliably, deploy after deploy.